I’ve given furniture “haircuts” to make it fit into a smaller space, but I think this was the first time I’ve taken a piece of furniture and “grown it” into a larger piece.
It all started when I was standing at our kitchen peninsula, staring at the back wall of our dining area and trying to decide what I could do to like it more. You can see this wall from almost our entire main level — from the front door, from the kitchen, from the living room — which is the curse of open-concept living. It needed to be a showstopping wall.
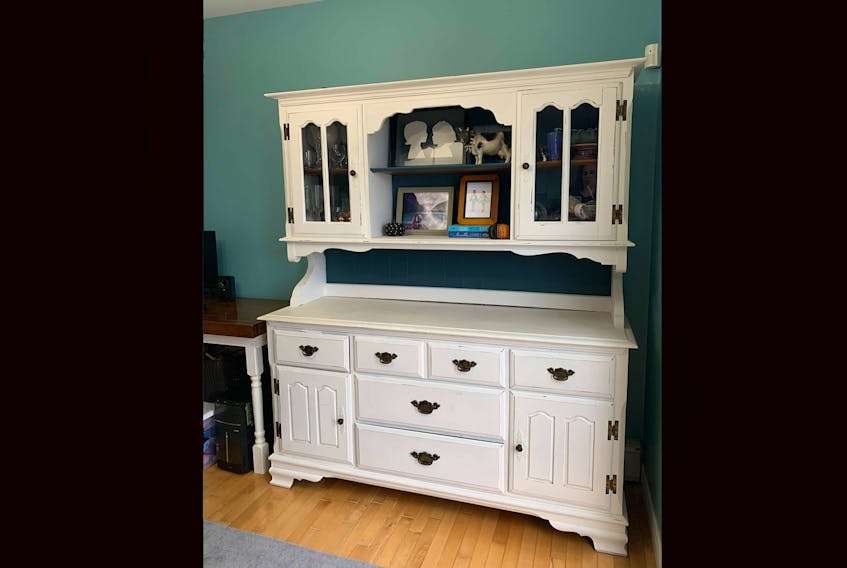
The wall was pretty blah, with just our hutch and our son’s computer desk.

We received our hutch as a hand-me-down when we moved in eight years ago, and it’s looked great since we painted it white. While I still loved the way the hutch looked, there was something “off” I couldn’t pinpoint. There was all this wasted space between the top of the hutch and the ceiling, and I just wanted to ... I don’t know, stretch it up!
Hmm.
I’ve heard of people raising their kitchen cabinets up and hanging them directly under the ceiling (I begged, but Handy Husband said no) because it “extends the eye” and makes the room feel taller. Could I do something similar with our dining room hutch?
My first thought was building a new section onto the top of the hutch, but then I realized it wouldn’t have the character of the rest of it. It would look like a modern add-on, even with all of our woodworking tricks.
The solution, I decided, was to add a new middle section so it wouldn’t be as obvious that our old hutch had been “edited.”

Handy Husband reluctantly agreed, mostly because it didn’t sound like a lot of work. We measured the distance from the top of the hutch to the ceiling and decided the new middle section needed to be 20” tall to get the full height we wanted.
I emptied the hutch and helped him lift the top half down, and then he went to his shed and unearthed two pieces of 2x12 (the same thickness as the sides of the hutch) and cut them to be 20” tall. He also used two 2x4s (also 20” tall) and glued/screwed them together in an L-shape for extra support. Then he ran 1x3 crosspieces across the front and back to keep everything square so the upper part of the hutch would sit evenly.
With the frame of the new middle section ready, we heaved the top part of the hutch on top of it. It was a lot more difficult now that we were lifting it above our heads! It was enormous and stately, all stacked together. I kept squealing “It’s like furniture from a castle!”
I started to get nervous that the top two sections would fall down and crush us, so I had Handy Husband secure all three sections together at the back with pieces of 1x3. We noticed the middle section was just a hair wider than the upper part of the hutch, so we solved that by adding slim pieces of wood above the seam to disguise the difference.
Then it was time to cover the middle section with some kind of beadboard or paneling like the top piece. We priced out several different options but ultimately chose to use click-together shiplap boards to build our own paneling. The hutch’s original paneling was vertical but it was cheaper for us to arrange the boards horizontally, so that made the orientation an easy decision.
We trimmed seven planks for the middle section (ripping the top board slightly so it fit) and five boards for the top section. We opted not to cover the original vertical paneling in the cabinets since you wouldn’t even notice through the glass doors once everything was painted the same.
Handy Husband’s final step was adding a couple of planks to the 1x3 crosspieces to create a new shelf where the top met the middle. We could have added a second new shelf in between the middle and the bottom, but we didn’t want things to get too crowded so we left that part open.
Then it was time for me to paint, paint, paint! I painted all of the paneling a warm greige (Putty by Fusion Mineral Paint). I was sad to see the pretty blue background go (“Homestead Blue”) but I wanted a really neutral, tone-on-tone farmhouse feel.
I had to paint the sides of the new middle section white, but I decided to use a slightly different shade I’d used on the hutch originally (Casement). My new favourite is a brighter white (Picket Fence) so I painted the new section with that, and just dry-brushed it over the older, warmer shade to freshen it up.
Loading up the hutch was fun since I had an entire extra shelf to use for decor — although I did have to scour the entire house to find enough “pretty” pieces for it, since I don’t buy a lot of decorations. I love the final effect of the white and greige together, with lots of white dishes and pops of greenery. It looks like the hutch was originally built this way, and it really does make the room feel taller.
Now, of course, all I can think about it tackling the gaping blank square of wall above the computer desk! Don’t worry — I already have an idea forming in my mind.

MORE OF HEATHER'S HANDMADE HOME: